So by now we’ve secured our box and we’re able to route calls between registered endpoints.
Next up we’ll need to add some external connectivity, meaning we can reach destinations that aren’t directly registered on our Kamailio instance.
We’ve signed up with imaginary carrier at “imaginarycarrier.com” so we can make / receive calls from the PSTN using them as a trunk. They’ll be authenticating us based on our Source IP which we’ve let them know.
These days you’d generally authenticate with a carrier by sending a REGISTER message to your carrier so they know your Address on Record, but to keep it simple we won’t be registering to a carrier, as that introduces another Kamailio module.
At the moment, when we receive an INVITE where the destination isn’t registered, we respond with a 404:
sl_reply("404", "User not Registered"); #If looking up location fails reply with 404But now we’ve got a carrier we can send calls to if the destination isn’t on our PBX, so we won’t need to reply 404 anymore for calls from our users.
So let’s only give the 404 reply to calls in from our carrier (inbound calls), and instead of giving a 404 response to callers from within our organisation, let’s send the calls to the carrier to make an outbound call.
This means calls to any destination that isn’t registered on Kamailio will go to the Carrier.
But we’ll need to still respond with the 404 response if a carrier sends us a call to a destination that isn’t registered, like an inbound call to a user who isn’t registered.
route[ONNETINVITE]{
          if(!lookup("location")){    #Try looking up location
                #If looking up location fails then:
                if(allow_source_address("200")){                            #Check if the request has come from a carrier
                        sl_reply("404", "User not Registered");     #If if it is from a carrier to a destination we don't have registered reply with 404
                        exit;                                       #And exit

                }else{                                              #If it's not from a carrier
                        route(TOCARRIER);                           #Route the call out to the carrier (to make an external call)
                }
        }
            route(RELAY);                  #Relay traffic to endpoint
            exit();                     #Exit

}
Next we’ll need to create our TOCARRIER route,
route[TOCARRIER]{       #Route to send calls to a carrier at 192.168.200.130
        rewritehost("imaginarycarrier.com");    #Rewrite host to be the carrier's IP
        route(RELAY);                   #Route relay

}
So let’s put this together and try and make an outbound call.
Call Flow
Outbound call to Carrier
First we see our UA make the call leg to Kamailio
UA to Kamailio: SIP: INVITE sip:61299999999@kamailio SIP/2.0
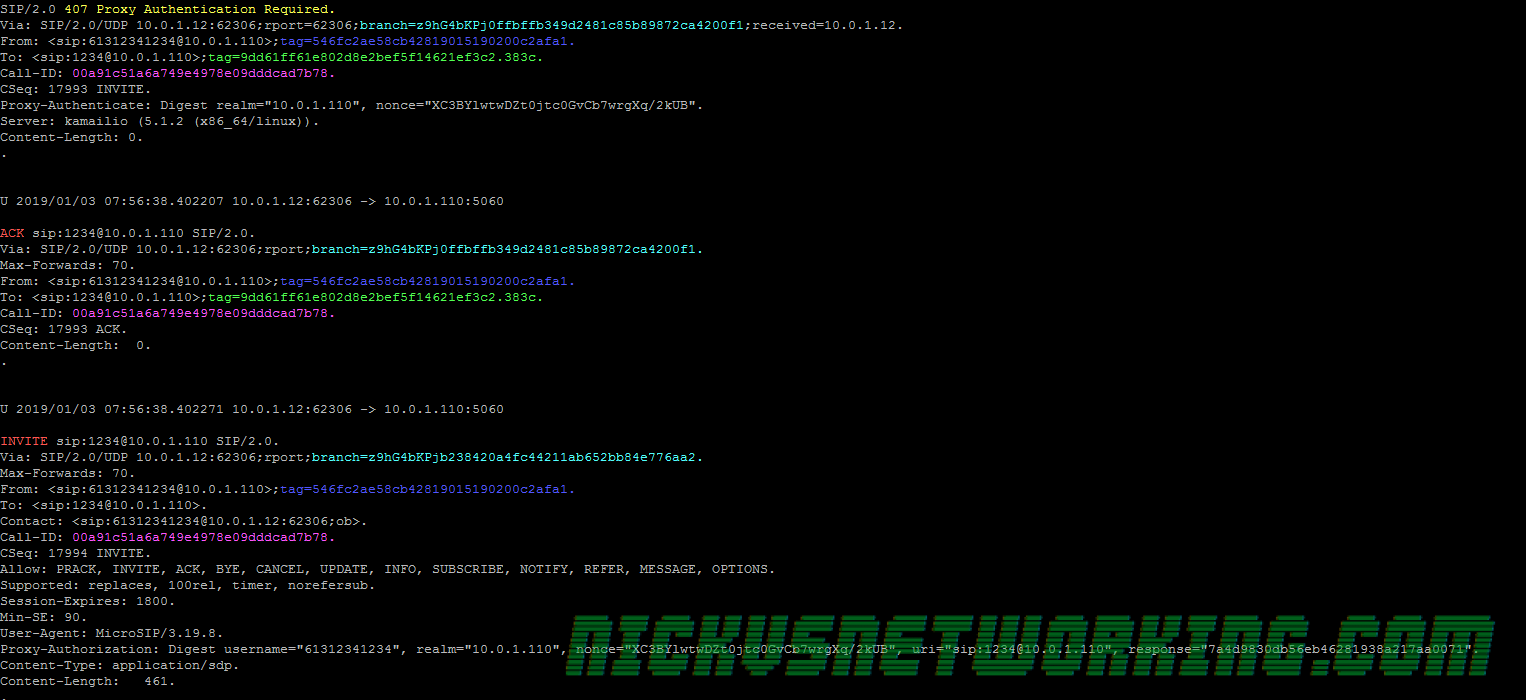
Kamailio asks the UA to authenticate itself and send that again, the UA does:
Kamailio to UA: SIP: SIP/2.0 407 Proxy Authentication Required (with challenge)

UA to Kamailio: SIP: INVITE sip:61299999999@kamailio SIP/2.0 (with auth header)
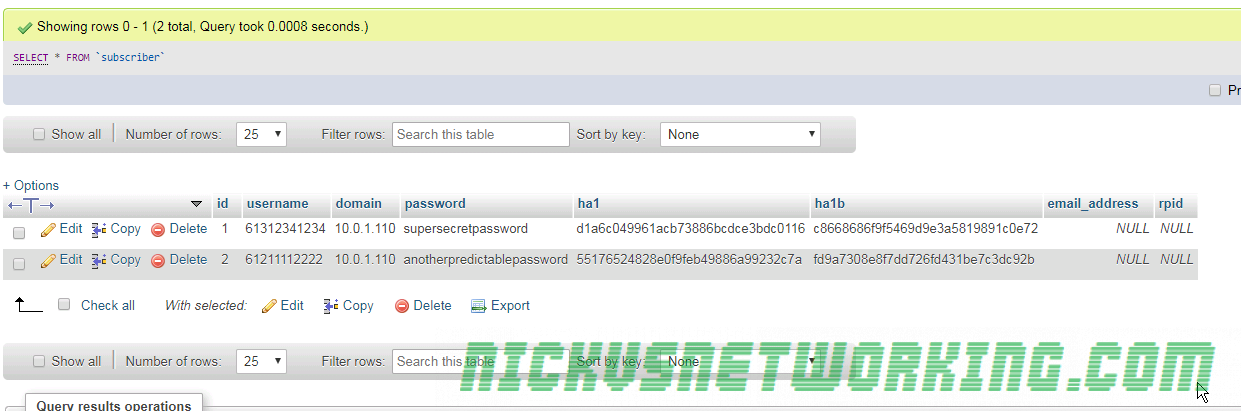
Now Kamailio has authenticated the user it attempts to lookup the location of 61299999999 in the location table.
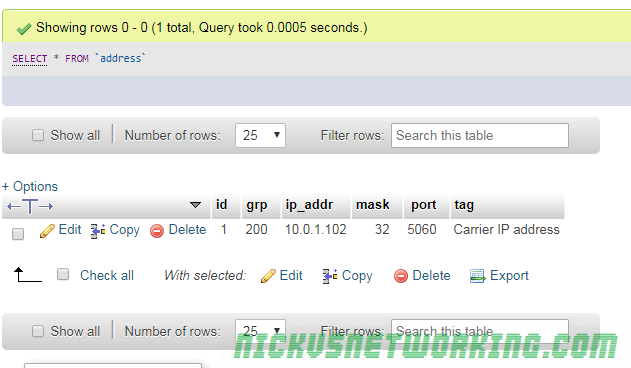
lookup("location")As no user is registered as 61299999999 this fails, so Kamailio checks the UA is calling from an address in Address Group 200, which we configured to contain the IP Addresses of all our Carrier’s switches that will be sending us calls.
if(allow_source_address("200"))It’s not in address group 200, as the from address isn’t one of our Carrier’s IPs, so it ends up at
route(TOCARRIER); The route block itself rewrites the host part of the request to be the Carrier’s IP, and then forwards it on to the carrier.
route[TOCARRIER]{ #Route to send calls to a carrier at 192.168.200.130
rewritehost("imaginarycarrier.com"); #Rewrite host to be the carrier's IP
route(RELAY); #Route relay
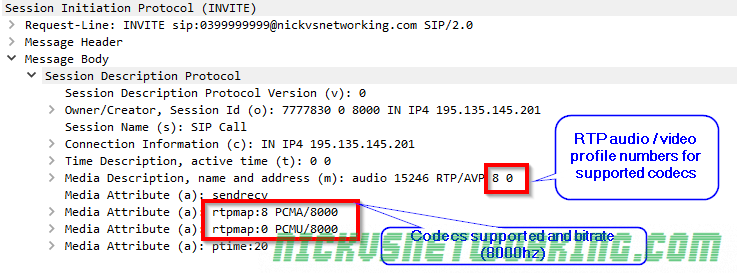
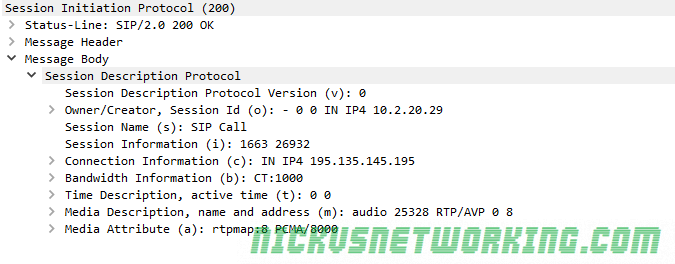
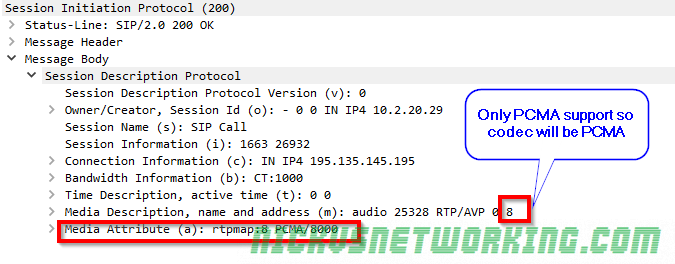
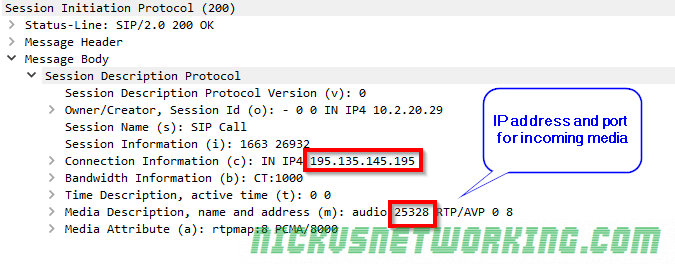
}Kamailio > Carrier: SIP: INVITE sip:[email protected] SIP/2.0
So now the INVITE has been forwarded to imaginarycarrier.com, and because we called route(RELAY); it’ll handle all the in dialog requests.
Inbound call from Carrier
So now we know how an outbound call flows, let’s look at inbound calls from the carrier.
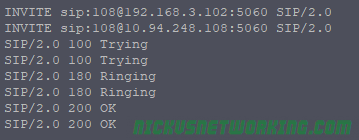
Carrier to Kamailio: INVITE sip:61312341234@kamailio SIP/2.0
Kamailio responds with a provisional response of 100 Trying
Kamailio to Carrier: SIP: SIP/2.0 100 trying -- your call is important to us
Now Kamailio checks to see the method type – It’s INVITE, and if the source address is in Address Group 200 (As we defined in Part 8), it is, so it calls the route(ONNETINVITE) block.
if(method=="INVITE"){
        if(allow_source_address("200")){        #If from a Carrier IP
                route(ONNETINVITE);          #Call INVITE handling bloc
Once we get to the ONNETINVITE block Kamailio tries to lookup the location, to see if there’s a device registered with a username that matches 61312341234, using:
lookup("location")There is, so the route(relay) is called, which forwards the INVITE to the IP it has an Address on Record for for 61312341234.
Kamailio > UA: SIP: INVITE sip:[email protected]:50017;ob SIP/2.0
The INVITE is sent to the UA and route(relay) handles all the in dialog requests.
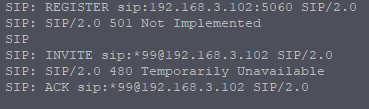
The final scenario we might have is if a call is made to 61299999999 and it’s not registered on Kamailio, let’s take a look at that signalling path:
Carrier > Kamailio: SIP: INVITE sip:61299999999@Kamailio SIP/2.0
The carrier sends the INVITE to Kamailio, Kamailio calls lookup location, which fails to return a location as 61299999999 isn’t registered.
Next we check to see if the call is from a carrier by checking if the source address of the INVITE is equal to address group 200.
if(allow_source_address("200")){ #Check if the request has come from a carrier
sl_reply("404", "User not Registered"); #If if it is from a carrier to a destination we don't have registered reply with 404
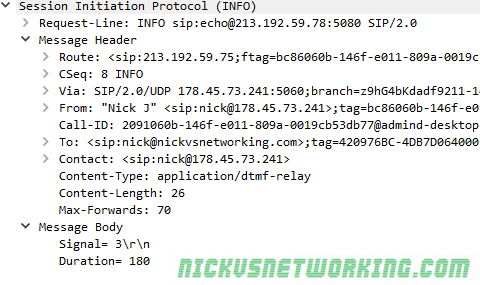
exit; As the source address is in address group 200, the carrier gets the 404 “User not Registered” reply, as we see in the packet capture:
Kamailio > Carrier: SIP: SIP/2.0 404 User not Registered
And that’s it.
I’ve put the complete code from this on Github.
In the next and final part, we’ll recap what we’ve learned.
Next Post – Kamailio 101 – Tutorial 10 – Recap
Other posts in the Kamailio 101 Series:
Kamailio 101 – Tutorial 1 – Introduction
Kamailio 101 – Tutorial 2 – Installation & First Run
Kamailio 101 – Tutorial 3 – Routing Blocks & Structure
Kamailio 101 – Tutorial 4 – Taking Registrations
Kamailio 101 – Tutorial 5 – First Call
Kamailio 101 – Tutorial 6 – Reusing Code
Kamailio 101 – Tutorial 7 – Security in Theory
Kamailio 101 – Tutorial 8 – Security in Practice